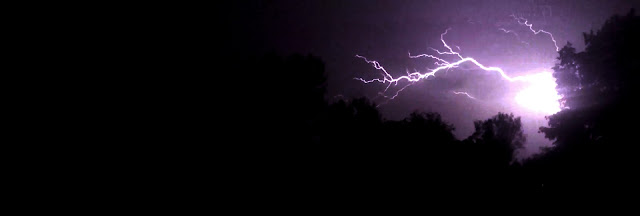
The power displayed in nature is fascinating. Thunderstorms are no exception. Using a GoPro 3, capturing stunning lightening photographs is super easy.
1. Set up your GoPro 3 in a secure place where the wind will not blow your camera over.
I usually use a suction cup mount, and place my camera on a second story window in my house facing whichever direction the storm is.
2. Begin recording the storm.
Be sure to allow for a lengthy period of time to ensure multiple lightening strikes. Storms occurring during the night are the best, but daytime can also work. Make sure you are shooting at 60 fps or greater. This will allow you to capture more of the lightning.
3. After you are finished recording, play back the footage on your computer.
When you find a good strike, pause the video. If you are using a Mac, make the video full screen, click once anywhere on the screen to make the play/pause menu disappear, and press Command+Shift+3. This keystroke takes a screen shot of your entire screen and saves it to your desktop.
4. Then you can place your picture into any photo editor to adjust the picture.
Here are some of the lightning strikes I've captured.
Creating interesting time lapse videos can be difficult. Often, the viewer becomes bored rather quickly. A great way to add some extra flare to a time lapse video is to use the Camalapse 3.
Camalapse 3 creates a panoramic view while the attached camera is shooting time lapse footage. The camera completes a 360 degree rotation is 60 minutes.
The Camalapse 3 is only capable of holding cameras that weigh less than 16 oz. If anything heavier is mounted to the Camalapse it will not rotate. A GoPro, however, is the perfect camera to mount to the Camalapse 3.
The Camalapse 3 is equipped with a 1/4" male adapter on top for easy camera mounting, as well as a 1/4" female adapter on the bottom so the mounted camera and Camalapse 3 maybe connected to a tripod.
The Camalapse 3 maybe purchased on Amazon for as low as $29.99. Although DIY rigs can be crafted with a cheaper price tag, this is still a great deal.
Here is a quick compilation of time lapse footage I've accumulated over the past year. Enjoy, Share, and Comment!
Film Fest, a student wide event at Maranatha Baptist Bible College in Watertown WI, occurs during the spring semester each year. Students are permitted to submit a video of their own making in order to win monetary prizes. This year's winner of the Film Fest: "How To" category was a movie entitled "How to Make a Movie in 60 Minutes. The original idea came from Luke Tanis and Peter Duran, and the movie itself was filmed and edited by myself using a GoPro Hero 2, GoPro Hero 3 Black Edition, and Final Cut Pro X. Comment below and share!
Benjamin Turcotte, currently a student at Maranatha Baptist Bible College, has worked at Camp Chetek in Chetek Wisconsin for one week two summers ago and trained junior campers several weeks this past summer. Ben also has his own personal blog which can be found here. During an interview with Ben, the following questions were asked in order to learn how GoPros could benefit a camp ministry.
1. What do you do there work wise? I will be training two photographers, running the media department, and creating promotional videos as part of a business internship. 2. How is videography used in a camp ministry? Videos are used as part of the camper week in game times and intro videos. They could also be used as part of staff training. The majority of my experience involves watching videos that camps have produced that are promotional in nature targeting younger campers or an explanation of the ministry targeted to teens and youth staff. 3. Why should videography be used in camp ministry? Videos allow for a refined, consistent delivery of content. They can be viewed at almost any time and any place. Instead of a staff member explaining camp using works and images, a video can allow the viewer to experience camp though sight and sounds. The script can be worked through to communicate exactly what it needs to be - rambling and unclear speech is minimized. 4. How can a GoPro better enable you to capture the message the camp wishes to share? The GoPro due to its size and ruggedness will be a great asset to capture activity times and water related activities. Instead of risking a larger, more expensive, and less rugged camera to achieve shots, the GoPro can be used in dangerous situations with minimal risk. 5. What specific camp activities can be captured with a GoPro that would not be possible with a typical camcorder? Camp Chetek has a biannual mudpit (happening this summer), camp wide water games for Inner City Outreach week, and various cabin activities including a blob, swimming, kayaking, and tubing. The GoPro can also be used as an action camera during game times where a camcorder would not be maneuverable.
Getting unique angles and good looking shots can be difficult with an ordinary camera. As this video demonstrates, a GoPro enables an individual to capture himself without the help of another. The far away feel of the shot adds a great deal to the video. Great job, Andrew Whiteford, for being so creative with your GoPro Hero Black Edition.
The versatility of GoPro expands everyday as people experiment with different mounting techniques. Chest mounts, head mounts, wrist mounts, helmet mounts, and suction cup mounts are typically used for GoPro. One of the newest mounting locations is on a remote control helicopter.
The majority of these GoPro equipped flying devices are actually referred to as Quadcopters because of the number of propeller. 4 Propellers provide adequate stability and substantial maneuverability. Because GoPro cameras are so light, they can be easily attached to these flying machines with out much difficulty.
DJI Phantom Aerial UAV Drone Quadcopter for GoPro
As illustated in these picture, GoPro quadcopters come in all shapes and sizes. Often they are homemade devices, but some copters such as the white one pictured directly above can be purchased from Amazon for only $679. This particular model contains a GPS system that will automatically fly the quadcopter back to the remote with the touch of a button.
Quadcopters have revolutionized how GoPro cameras can be used. The following possibilities have been made available through the combination of Quadcopters and GoPro.
High Angles
Surveillance
Fast movement through the air
Professional edge
Unlimited accessibility in hard to reach areas
Here is a video demostrating the power of this amazing piece of technology. Enjoy!
GoPro Cameras have amazing capabilities and new capabilities are being discovered everyday. One such feature that GoPro is being used for is called GoPro array. Basically this technique freezes the shot and give the appearance that the camera is rotating while the video is frozen. In order to achieve an effect as complex as this, have multiple GoPros is necessary. Typically the people who create these vides are sponsored by GoPro so they do not have to purchase 10 or more GoPros. Here is a video which I found on Vimeo that gives a good sense of what a GoPro array looks like. Enjoy!
The following post is a side-by-side comparison of the GoPro HD Hero 2 and the GoPro HD Hero 3. Through this Prezi presentation, the basic differences between the two models will be explained. If any further questions come up either comment below or contact GoPro Support.
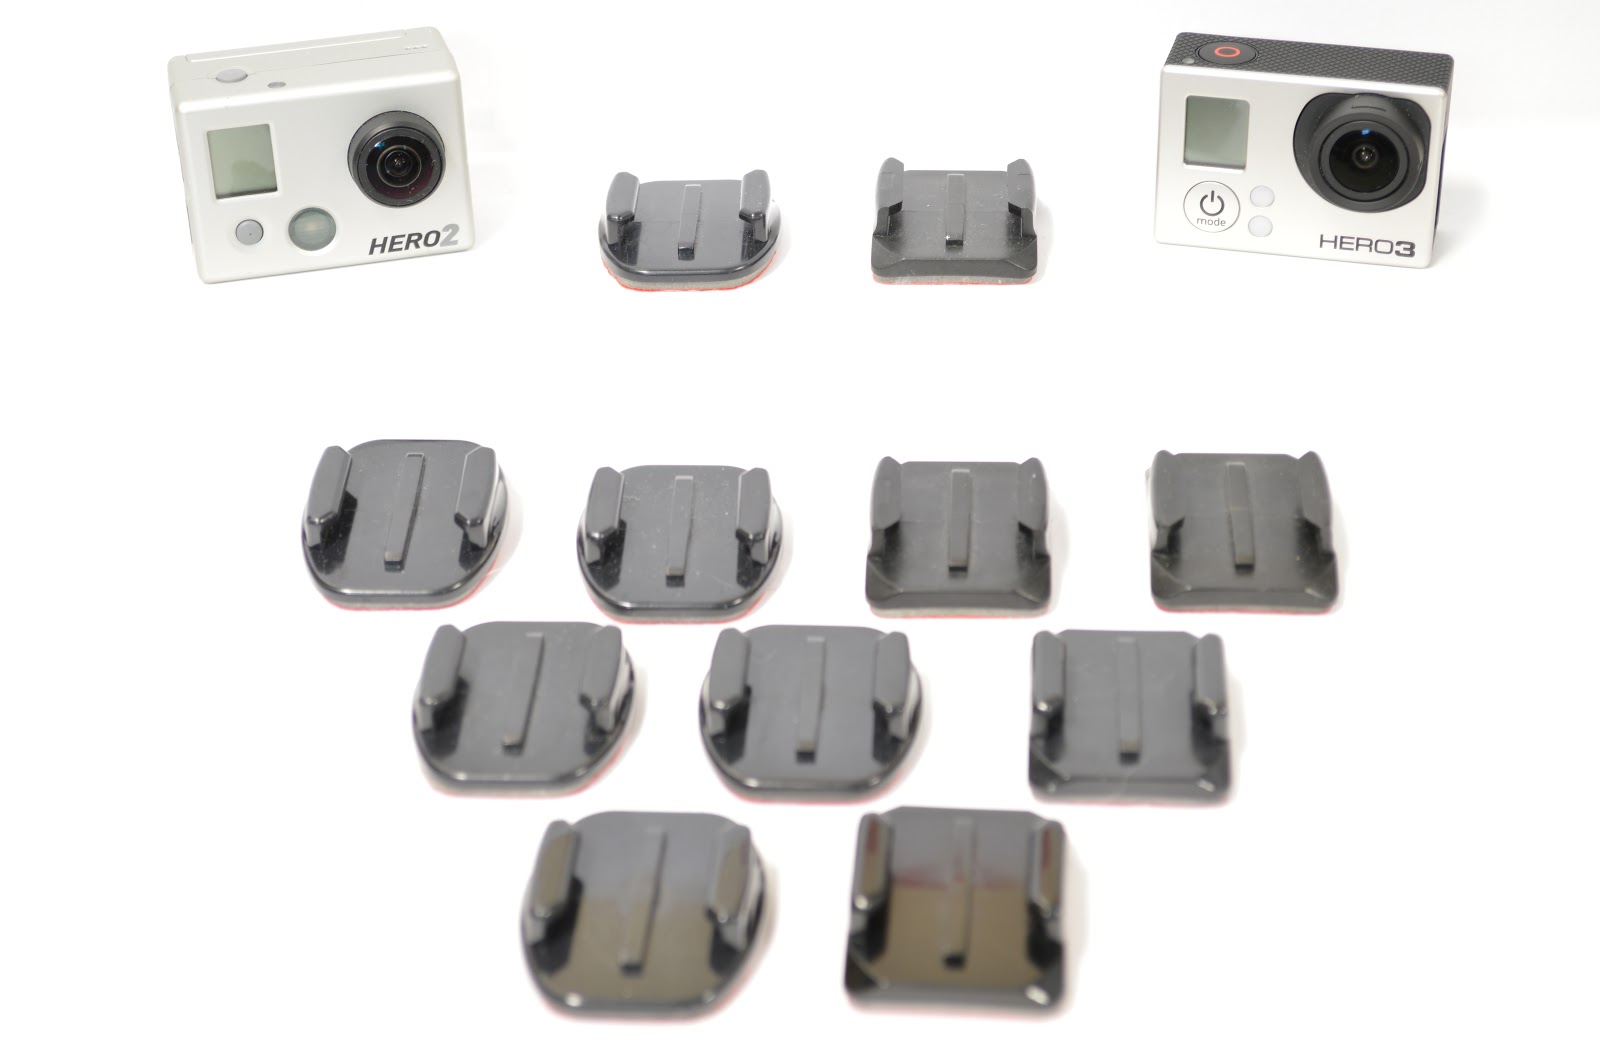
Curved and flat adhesive mounts semi-permanently stick to the surface on which they are place. Using 3M stick technology, these mounts are great for both curved and flat surfaces. It is important to think creatively when using these mounts. Although these sticky mounts can be removed with heat (using a hair dryer), it is best to place these mounts somewhere they will stay for an extended period of time.
The quick release technology make it easy to transfer the camera from one mount to another. Simply squeeze the two tabs together and slide forward. This feature allows for quick angle changes without the hassle of unscrewing the camera from the quick release mount.
The picture below shows the two types of quick release buckles. The vertical surface J-hook buckle (left) is used for mounting on vertical surfaces such as the side of a helmet or the side of a car. The J-hook buckle is also used on the chest mount. The horizontal quick-release buckle is used for horizontal angles such as the top of helmet or on a ski/snowboard.
Creative thinking can be put to good use with the adhesive mounts. Below is a handle I created using the handgrip of an old airsoft gun. After removing the handgrip I simply stuck a flat adhesive on the top. Homemade mounts can be created from anything and can be a very inexpensive alternative to official equipment.
In order to purchase additional mounts follow these available links to the appropriate mounts. And as always, please leave your comments, questions, and suggestions below. Adhesive MountsQuick-Release Buckles
Through the use of GoPro, the creation of photographic cloning is greatly simplified. Using the burst setting, you can take a certain amount of photos in a given time. For the GoPro Hero 3 Black Edition, the photos can be taken in the following amounts and time periods:
3 photos/1sec
5 photos/1sec
10 photos/1sec
10 photos/2sec
30 photos/1sec
30 photos/2sec
30 photos/3sec
Choosing the appropriate burst speed depends upon the speed of the activity being photographed. A person moving at a walking speed would require less pictures per second, while a running individual would need more pictures per second. Experiment with different burst speeds to find one that works. After successfully capturing your photos, you must know how to properly edit them. Using a photo editing program such as GIMPis a quick and easy way to "clone" yourself in still photography. Hopefully in a future post, I will create a how-to-video that will explain the exact process with more detail, but for now I will talk you through the simple 2-step process of cloning yourself.
1. Upload Photos
Uploading photos can be accomplished in multiple ways, but the simplest method is to click and drag the photo to the empty space within the work area of GIMP. After the first photo is uploaded, drag the next photo in the sequence directly on top of the first photo.
2. Crop Photos
Select the rectangular selection tool from the tool menu, click and drag until the desired area is surrounded by a dotted-line. Next, drop down the Layer menu tab and choose "crop to selection."A tip to keep in mind is to make sure your photos are separated so they do not over lap. In this simple form of cloning, overlapping images will not look convincing.
Below are a few examples of easy-to-make "clones" of myself. Please leave your comments, concerns, or questions below.
For this post, an interview was conducted through email with
GoPro Support personnel, Lauren E., who was kind enough to answer the following
questions. I would also like to express my gratitude toward GoPro for their
efforts to provide answers to inquiries with amazing speed. Let’s look at what
Lauren said in response to my questioning.
1.How old is the GoPro Company?
GoPro created their first
camera in 2004, when Nick Woodman wanted a camera he could wear on his wrist
while surfing.
2.What was the inspiration behind the creation of
such an awesome device?
Nick is big into extreme
sports, specifically surfing and wanted to film the action with a small, light,
waterproof camera.
3.How many cameras have been sold since the
company’s founding?
We do not have specific
numbers to provide to the public, but let's just say that we have released
several models of our cameras and our company has definitely blossomed more in
the last few years!
4.What is the most extreme environment a GoPro has
ever endured?
Although we do not hear
everything that goes on with people and their cameras, our new cameras are heat
resistant to the point where firefighters are using them in action. A shark
tank owner once told me he had a few cameras eaten in his tank. We've also had
reports of cameras falling out of airplanes and surviving in great condition.
One customer lost their camera in the ocean and months later someone else found
it in great condition and posted the video of the ocean floor on YouTube.
5.What is the most common mounting method?
Mounting depends on the
sport- many people love the Chest Mount Harness (that you can wear around your
chest) or the Head Strap Mount (a mount to wear on your head), but our first
camera was made only for your wrist, so that is popular as well.
6.What is the most creative mounting method?
If you do a Google search for
GoPro mounting you would find endless ideas. People are mounting these things
to their dogs, kids and a variety of things. I've heard of customer's creating
their own plastic mounts to custom fit exactly where they want it.
7.What is the most sold mounting accessory?
Oh man, I wouldn't say we
have a "most sold" mounting accessory - we have such a large variety
of people who purchase these and for such a variety of different reasons - but
here are some common ones: Chest Mount Harness, Suction Cup Mount,
Handlebar/Seatpost Pole Mount, Head Strap Mount, Tripod Mount.
8.How was the name “GoPro” created?
When Nick Woodman was coming
up with his product, he wanted a camera that was professional but usable by the
general public... and you always want something catchy, right? Hence, the name
GoPro.
9.What creative and new ways things are GoPro users
capturing with their GoPros?
When you are thinking of the
list of things people do with their cameras, the list is endless and the sky is
the limit. I can't even begin to tell you!
10. How does (or should) GoPro plan on expanding into new areas?
We are always looking to
expand and improve our world-class product. We love customer's suggestions and
we take those into consideration. I apologize but we don't make all of our
plans public. Sign up for our newsletter to be made aware of new announcements.
Check it out here: http://gopro.com/newsletter/
Thanks once again, GoPro, for your willingness to
share about your amazing cameras. Now let’s hear how the rest of us love to use
our GoPro cameras!
Here is video of an interview with Nicholas Woodman, GoPro's Founder that more clearly explains the founding, growth and success of GoPro.
Time Lapse videos are super fun to make and relatively simple provided the proper equipment. GoPro cameras are perfect for shooting time lapse footage due to the small size. Because they are so small, they can be easily hid and left in one spot for a lengthy period of time without worry of someone finding and stealing the camera. In this post 5 tips for making a time lapse with a GoPro will be discussed. Please leave comments on how you enjoy shooting time lapse footage with your GoPro!
1. Movement Matters
The focus of your video should be on an area of terrain with objects are consistently moving. The whole purpose of time lapse footage is to capture long progressions of movement in a short period of time. Good subjects would include sunsets/sunrises, densely populated areas, automobiles, and changes in weather. In the end, make sure the movements of your subject are numerous enough to keep the attention and interest of your audience.
2. Vary Variety
Keep a healthy variety within in the kinds of footage you shoot. The general theme of the video should be consistent, but at the same time not boring. Be creative in the locations from which you film. Once again, you need to make your time lapses unique and created, otherwise they will put your audience to sleep.
3. Placement Pointers
Where you put your GoPro is very important. You want to make sure the very is good, but if you plan on leaving your camera unwatched, try to disguise the location of your camera. One of the advantages of using a GoPro is that they can be disguised very easily. When disguising your camera be sure the blinking red light which signals when the camera is recording is turned off. I have seen that there are several websites that offer camouflage skins which can be placed on the GoPro housing to increasing its invisibility.
4.Musical Magic
The music you use in your time lapse video should be appropriate for the theme involved with your video. For instance, scenery time lapse videos usually contain a piano accompaniment. Make sure the music promotes feelings similar to the visuals being shown. The music needs to compliment the time lapse instead of detracting from it.
5. Blending Blurs
A cool feature which some people put in their time lapse videos is called Tilt Shift. It involves inserting horizontal blurs on the top and bottom of the shot using editing software. The result creates an illusion that the picture is farther away the subject seems to be smaller.
Hello and welcome to uGoPro. Here you will find creative and inspiring tips for using "the world's most versatile camera," the GoPro Hero. Whether you are an amateur GoPro user or a sponsored GoPro fanatic, this blog will benefit you by providing unique and various mounting techniques. Ultimately, the goal is to inspire new and innovative uses for GoPro cameras. Please subscribe to get email updates on daily posts.
Check out how social media is used in the business world at Most Things Techy See how Fstoppers shares tips for photo editing and techniques.
About the Author
Author of uGoPro, Jimmy McKeever, created this blog due to his fascination of GoPro wearable cameras. Because of their extreme versatility, Jimmy desires to share how he uses his various GoPros and to receive feedback from GoPro users around the world.


 GoPro Photos
 Winter Photos